Bạn đang tìm kiếm cái gì?
Bọc ống xả là giải pháp tuyệt vời để tăng hiệu suất và tuổi thọ động cơ. Bằng cách bọc ống xả, bạn có thể giảm nhiệt thoát vào khoang động cơ, mang lại môi trường động cơ mát hơn, mã lực được tăng cường và luồng khí thải hiệu quả hơn. Hướng dẫn này sẽ hướng dẫn bạn quy trình lắp đặt bọc ống xả để đạt được hiệu suất tối đa.
Bọc ống xả phục vụ nhiều chức năng, chủ yếu nhằm cải thiện hiệu suất động cơ. Nhiệt độ cao trong hệ thống ống xả khiến động cơ phải làm việc nhiều hơn. Bọc ống xả giúp cách nhiệt các đường ống, cho phép khí thải chảy qua hệ thống nhanh hơn, cuối cùng là cải thiện mã lực và mô-men xoắn. Ngoài ra, nó còn giúp giảm nhiệt độ bên dưới mui xe, giảm tiếp xúc nhiệt với các bộ phận khác như dây điện, ống mềm và cảm biến, giúp tăng tuổi thọ và độ tin cậy của chúng. Đây cũng là một cách đơn giản để cải thiện hiệu suất sử dụng nhiên liệu vì động cơ không cần phải làm việc vất vả để đẩy khí thải ra ngoài.
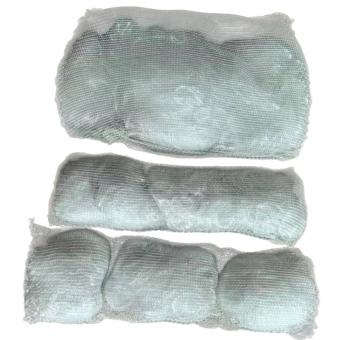
Trước khi bắt đầu bọc ống xả, hãy thu thập tất cả các vật liệu cần thiết. Bạn sẽ cần bọc ống xả, dây buộc bằng thép không gỉ hoặc kẹp ống, găng tay, kính an toàn và nước để ngâm bọc. Làm ướt bọc ống xả trước giúp xử lý dễ dàng hơn vì nó trở nên linh hoạt hơn khi bị ướt. Bạn cũng có thể muốn có những dụng cụ cơ bản như tuốc nơ vít hoặc kìm để siết chặt các kẹp.
Chuẩn bị bề mặt: Đảm bảo ống xả sạch và không có dầu, bụi bẩn hoặc mảnh vụn. Điều này giúp lớp bọc bám chặt vào bề mặt và ngăn chặn mọi sự can thiệp trong quá trình lắp đặt.
Ngâm bọc: Ngâm bọc ống xả vào nước khoảng 15-20 phút cho mềm. Điều này không chỉ giúp linh hoạt mà còn làm giảm sự sờn của vật liệu trong quá trình bọc.
Bắt đầu gói: Bắt đầu tại điểm gần ống xả nhất và tiến dần về phía cuối ống. Đảm bảo chồng lên nhau khoảng ¼ inch để đảm bảo độ che phủ hoàn toàn. Giữ chặt lớp bọc để loại bỏ mọi khe hở không khí có thể làm ảnh hưởng đến đặc tính cách điện.
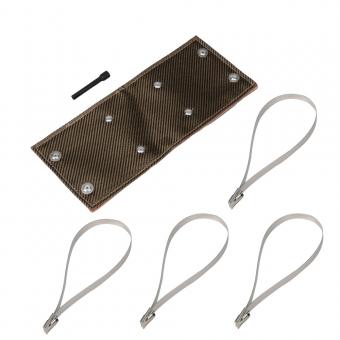
Cố định lớp bọc: Khi bạn đã đến cuối ống, hãy cố định lớp bọc bằng dây buộc bằng thép không gỉ hoặc kẹp ống. Những ốc vít này đảm bảo rằng lớp bọc vẫn ở đúng vị trí ngay cả khi tiếp xúc với nhiệt độ cao và rung động trên đường.
Làm khô và bảo dưỡng: Sau khi lắp đặt, để lớp bọc khô tự nhiên hoặc bằng cách cho động cơ chạy trong thời gian ngắn. Việc xử lý lớp bọc bằng cách chạy động cơ giúp hóa rắn vật liệu và đảm bảo độ bền lâu dài.
Sau khi lớp bọc được lắp và xử lý, bạn nên kiểm tra định kỳ xem có dấu hiệu bị mòn hay không, đặc biệt sau những chuyến đi dài hoặc tiếp xúc với thời tiết khắc nghiệt. Mặc dù lớp bọc chất lượng cao có độ bền cao nhưng các mảnh vụn trên đường hoặc độ ẩm quá cao cuối cùng có thể gây sờn hoặc hư hỏng.
Bằng cách làm theo các bước này, bạn có thể cải thiện hiệu suất của xe đồng thời bảo vệ các bộ phận chính của động cơ khỏi nhiệt độ quá cao. Bọc ống xảlà một bản nâng cấp hiệu quả và tiết kiệm chi phí, không chỉ tăng công suất mà còn kéo dài tuổi thọ của các bộ phận xung quanh bằng cách kiểm soát nhiệt độ. Cho dù bạn là thợ cơ khí chuyên nghiệp hay người đam mê DIY, việc lắp đặt bọc ống xả là một quá trình đơn giản có thể mang lại kết quả đáng kể cho cả việc lái xe hàng ngày và sử dụng hiệu suất cao.

No.10, Chuangxin North Road, Nanshan Park, Ningguo Economic and Technological Development Zone, Ningguo City, Anhui Province, China
điện thoại/Whatsapp : 0086-15856303740
e-mail : sales@bstbraidedsleeve.com
Skype : vanesa-cheng